15. Reports
This chapter covers the use of the report wizard for creating reports that are integrated with CRM and output reports based on the records in the currently selected view (or form) to a variety of outputs including pdf and Excel.
Note: The report wizard actually creates a report file within SQL Server 2005 Reporting Services which can be worked on and extended by a developer if more complexity is required.
There are a number of alternative methods for extracting data from CRM which could be considered before creating a report:
· Personal views can be defined easily to export (and re-import) data from CRM using a spreadsheet.
· Mail merge files can be saved as a means of exporting address information.
· Complex SQL Server reports can be created by a programmer and integrated with CRM.
· The CRM database can be accessed directly (using ODBC) from an external program or reporting software (for example Crystal reports).
You should note that the CRM database is a SQL Server database and can be accessed directly using a variety of standard software, including Microsoft Access and Office, Crystal reports and many other report writers and database access software programs.
Note: Remember to log in to the database using your windows identity so that the CRM security settings are preserved and to use only the views prefixed with the word filtered.
15.1. Report Viewer
Reports can be integrated and run from several different places within the CRM interface:
· Reports can be called from the workplace-reports area with default or custom selection criteria.
· Reports can be run from the current view, which allows a single record or all records in the current view to be selected. The user can also control+click on a selection of required records to be included in the report.
· Reports can be called when looking at a form in which case just a single record is selected for the report.
Reports appear in a report viewer which may allow items to be sorted by clicking on the arrows to the right of the column heading (some reports also have drill down facilities and hyperlinks). The user can also print the report or choose a format for exporting to a file.
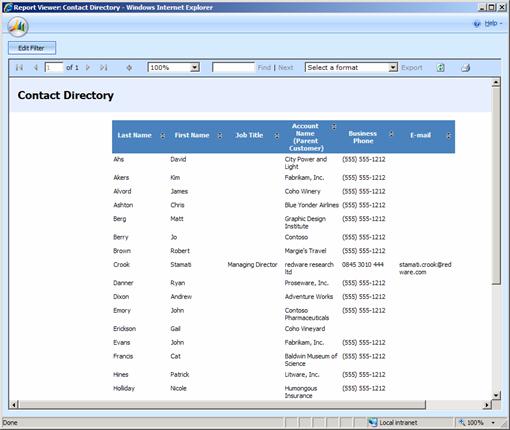
Reports can be exported into several different formats:
· XML. XML is a good format for exporting to other applications (and particularly good for programmatic access).
· CSV. CSV is a general format readable by the widest range of software programs.
· TIFF. This is an old graphic format and not recommended.
· Adobe PDF. PDF documents are the best format for distributing reports widely and can be printed from any machine (you need to download the free Adobe Reader).
· Excel. Reports is exported as a spreadsheet and formatting is preserved as much as possible. This is a good format for distributing to other users who need to cut and paste the data.
· Web Archive. A proprietary Microsoft format easily publishable as web pages accessible from a browser (not recommended).
Note: Selecting an output format requires the export to excel security permissions to be available to the current user.
15.2. Report Wizard
The Report Wizard allows the creation of simple reports (implemented in SQL Reporting Services) that are automatically integrated into CRM.
You can start the report wizard by creating a new report from the workplace-reports work area and you can modify an existing report or start from scratch. You need to specify a report name and choose the base entity (or record type) for the report. You can also choose a related entity here to show related records for the base entity (usually a one-to-many relationship, for example activities against a contact).
The next page allows you to specify report filtering criteria. Perhaps you can clear these and specify them in the reports form at the end of the process. Press next and the Lay Out Fields form appears, allowing you to add fields to the report and specify the sorting criteria.
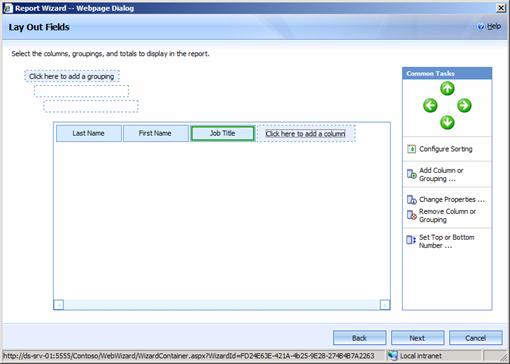
To add fields click on the Click here to add a column button and select the required field. You can select from the base entity and all related entities also (just many-to-one relationships) and can use the Change Properties button to change the width of the column. Use the green arrows to move the selected column and change the order of the columns in the report.
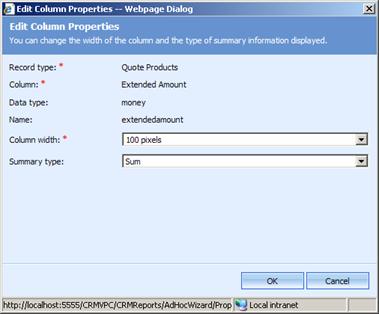
You can add a group to the report selecting the click here to add a group option and picking the appropriate field to group on. This allows you to specify totals for each numeric field and will be used if you want to create a chart in the report. Click on Configure Sorting to specify the default sort selection.
You will be prompted to add a chart to the report before finalising it. You can run the report wizard against the report at any time again to modify your report design.
The report form appears once the report has been completed and allows you to fine tune the integration with CRM. You can change these report settings by selecting the edit-report options from the actions menu in the workplace-reports area after you have selected the report in the report list.
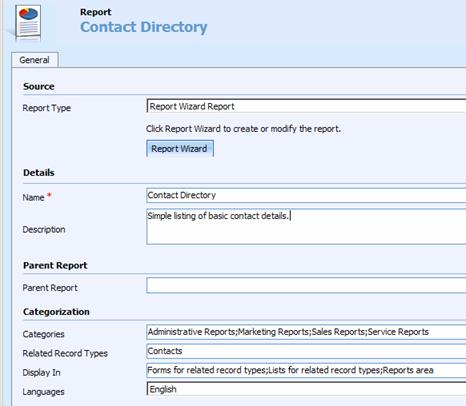
The categories section simply specifies the views within the workspace-reports work area which present the report. A more important integration feature is the Display In option, which provides the three kinds of integration mentioned earlier:
· Forms. This allows a report to run when viewing a single record in a form.
· Lists. Allows a selection of records from the current view to be included in the report.
· Reports. Adds the report to the workplace-reports work area according to the categories specified and uses the default filter to select records.
You should set the default report filter for each report (available from the actions menu of the report view) to select an appropriate range of records if you are calling the report from the workplace. The default filter can be overwritten when running the report and is not required for reports only called from a view or a form.
You can share your report with other users or make it available to the whole organisation from the actions menu on this form. A programmer can download the report to do further modifications and you can also schedule the report to run automatically within SQL Reporting Services or make it available to external users.
15.3. Running Reports
Reports can be run by pressing the report button available, where a report has been specified, on a form or a view.
Note: Running a report from a View allows individual records to be selected with control+click.
You have much more control over reports when running from the workspace-reports area. You can run or edit the report or run the report wizard again to change the report specification.
The report filter allows you to specify the filter selection on your report to produce summaries according to, for example, a date range or include only items created within the last month.
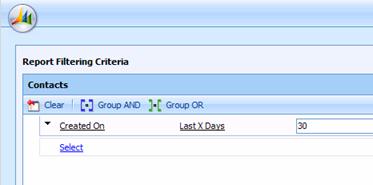
Quite complex report selection criteria, including related entities, can be built, and the filter criteria can be overwritten by the end user when running the report.
15.4. Scheduling Reports
Reports can be scheduled to run at particular times to save on resources when many different people want to view the same report. Select the scheduling option from the actions menu of the report selected in the workplace-reports area:

15.5. SQL Server Reporting Services
Microsoft CRM reports are built on top of a software technology known as SQL Server Reporting Services. Previous versions of CRM required technical expertise in this technology in order to build even simple reports which can now be built using the Report Wizard.
There are limitations to the complexity and power of reports created with the Report Wizard and all reports can be downloaded and worked on by a programmer and still remain integrated with CRM. More complex reports may need to be created from scratch by the programmer.
Note: Existing reports can be downloaded from the CRM environment (select a report in the workplace-reports area and use the action menu) and modified by a programmer using the report designer in Visual Studio 2005.